Do you know how to show advanced tooltips using Elementor? It may be a common topic but we receive so many queries about the tooltip feature and how users can use it. As we thought, it’s easier to write down about the usage of tooltips rather explain every single time.
Table of Contents
ToggleSo, let’s talk about tooltips in Elementor Page Builder plugin.
What is an advanced tooltip?
Elementor has become one of the hottest page builders out there. It has a lot of useful features and one of the most interesting is the tooltips. You can add a short description of anything through the tooltip and it can even be an image.
Advanced tooltip is a graphical user interface (GUI) element used in conjunction with the cursor or mouse pointer to display information about an item without needing to click on it.
The typical scenario for summoning an advanced tooltip is to hover the mouse cursor over another GUI element such as a tool icon in a software application, and it is also prevalently used on websites. A tooltip is also known as a hint, infotip, or screentip.
What does advanced tooltip do?
Depending on the application, the advanced tooltip can display anything from the full name of the object the mouse is hovering on, to displaying additional information or a detailed explanation of what that tool or object does.
For example, in Windows Explorer when hovering the mouse over a file, the details of that file such as the format type, size, and date modified fields are displayed, and hovering the mouse over the local drive partition displays the free space and total size of the drive.
How to show advanced tooltips using Elementor?
Now, we will show you the process to show advanced tooltips. To do that, you have to follow these steps below:
Step-1: Insert a widget
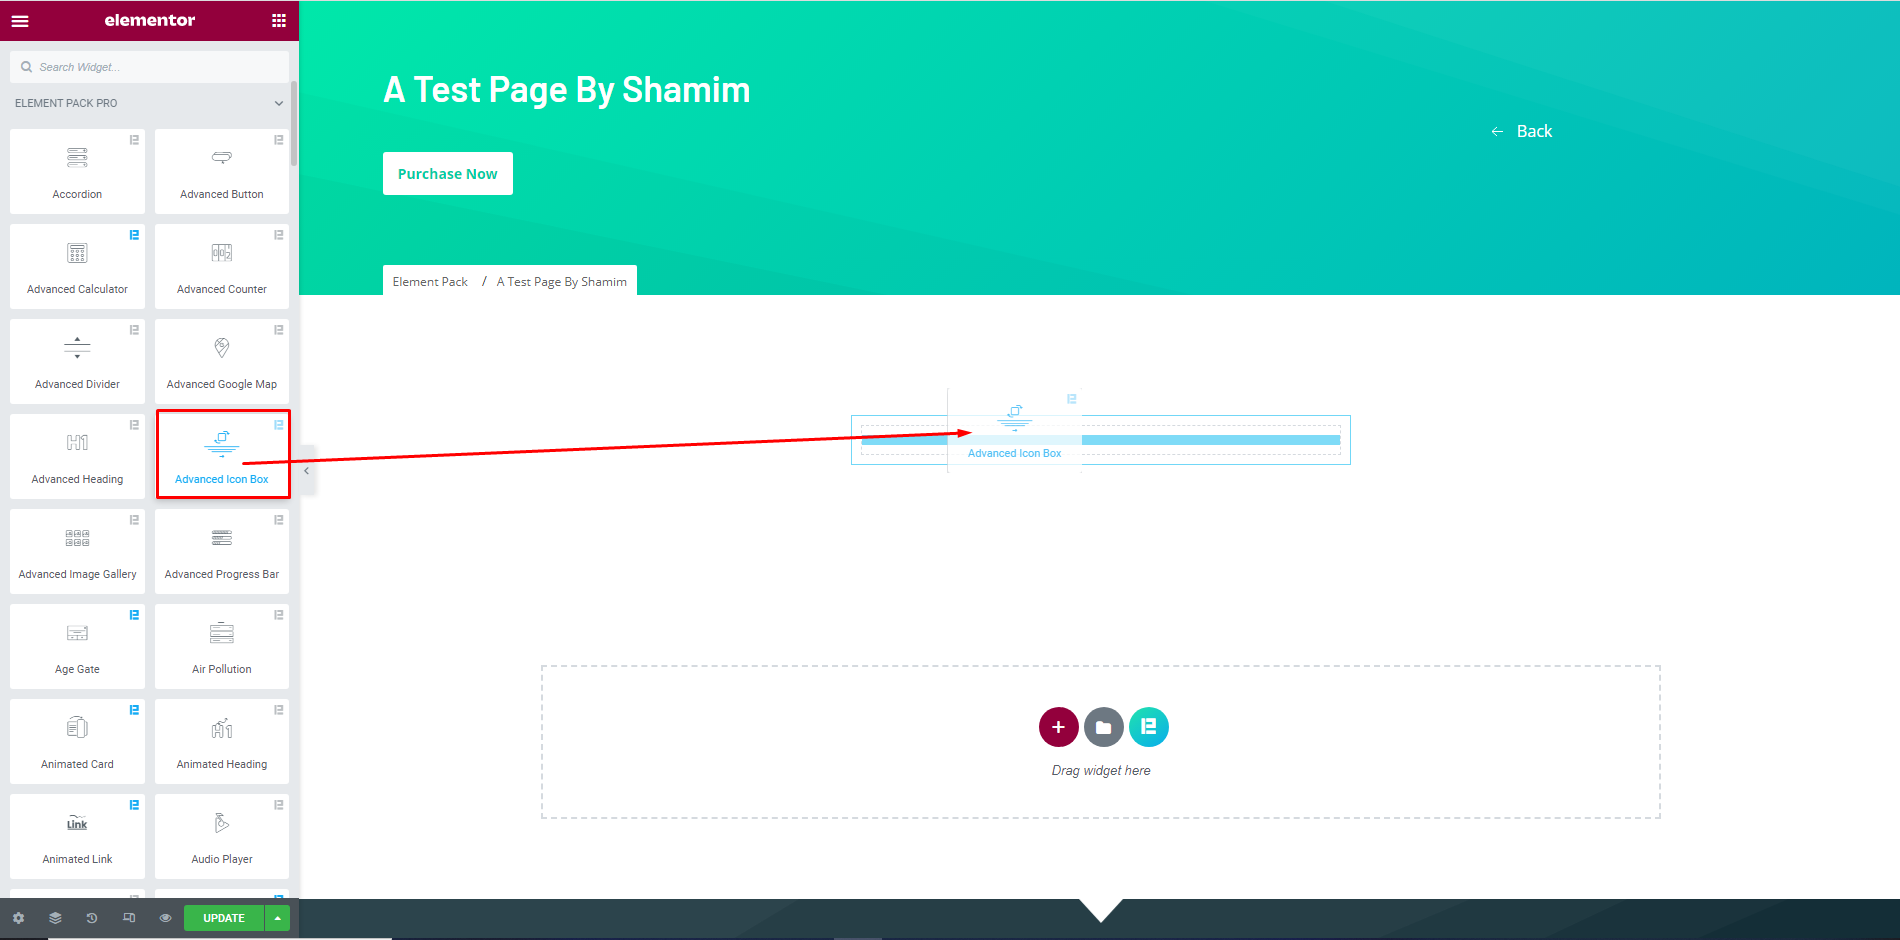
At first, go to the widget menu, then insert a widget into the page. For instance, we have picked the ‘Advanced Icon Box’.
Step-2: Enable the Tooltip switcher
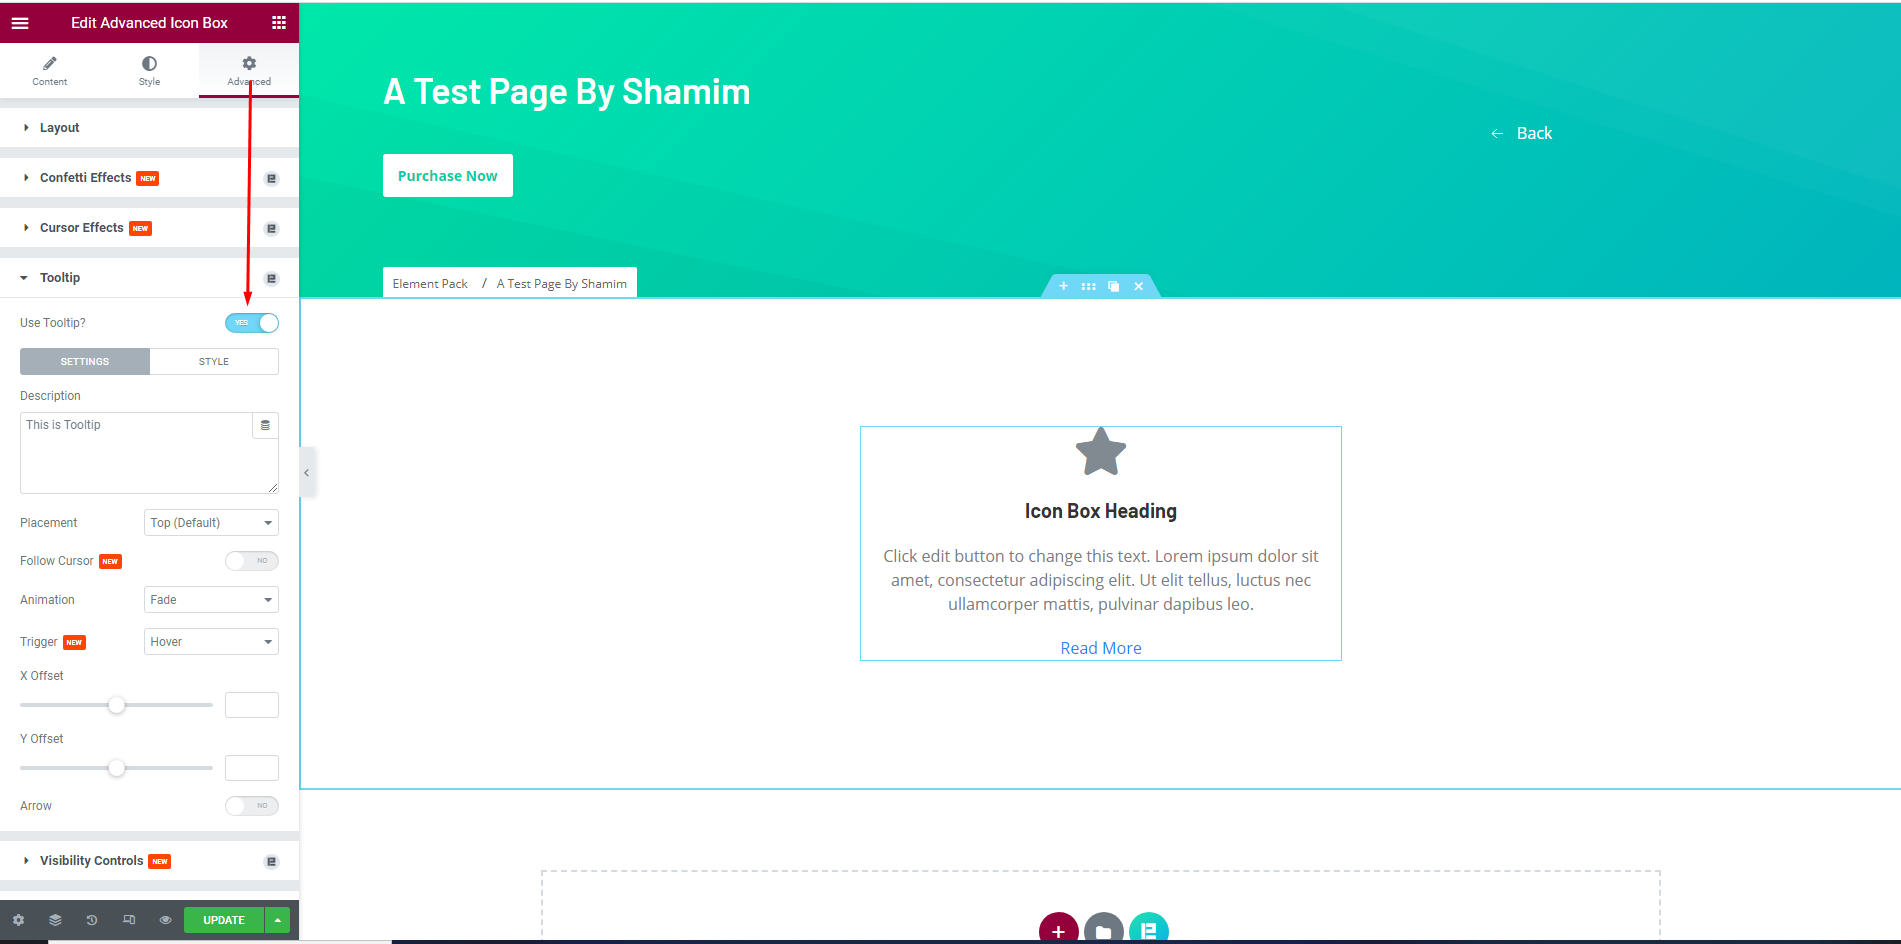
After that, go to the Advanced tab, then enable the ‘Use Tooltip?’ switcher.
Step-3: See the effect
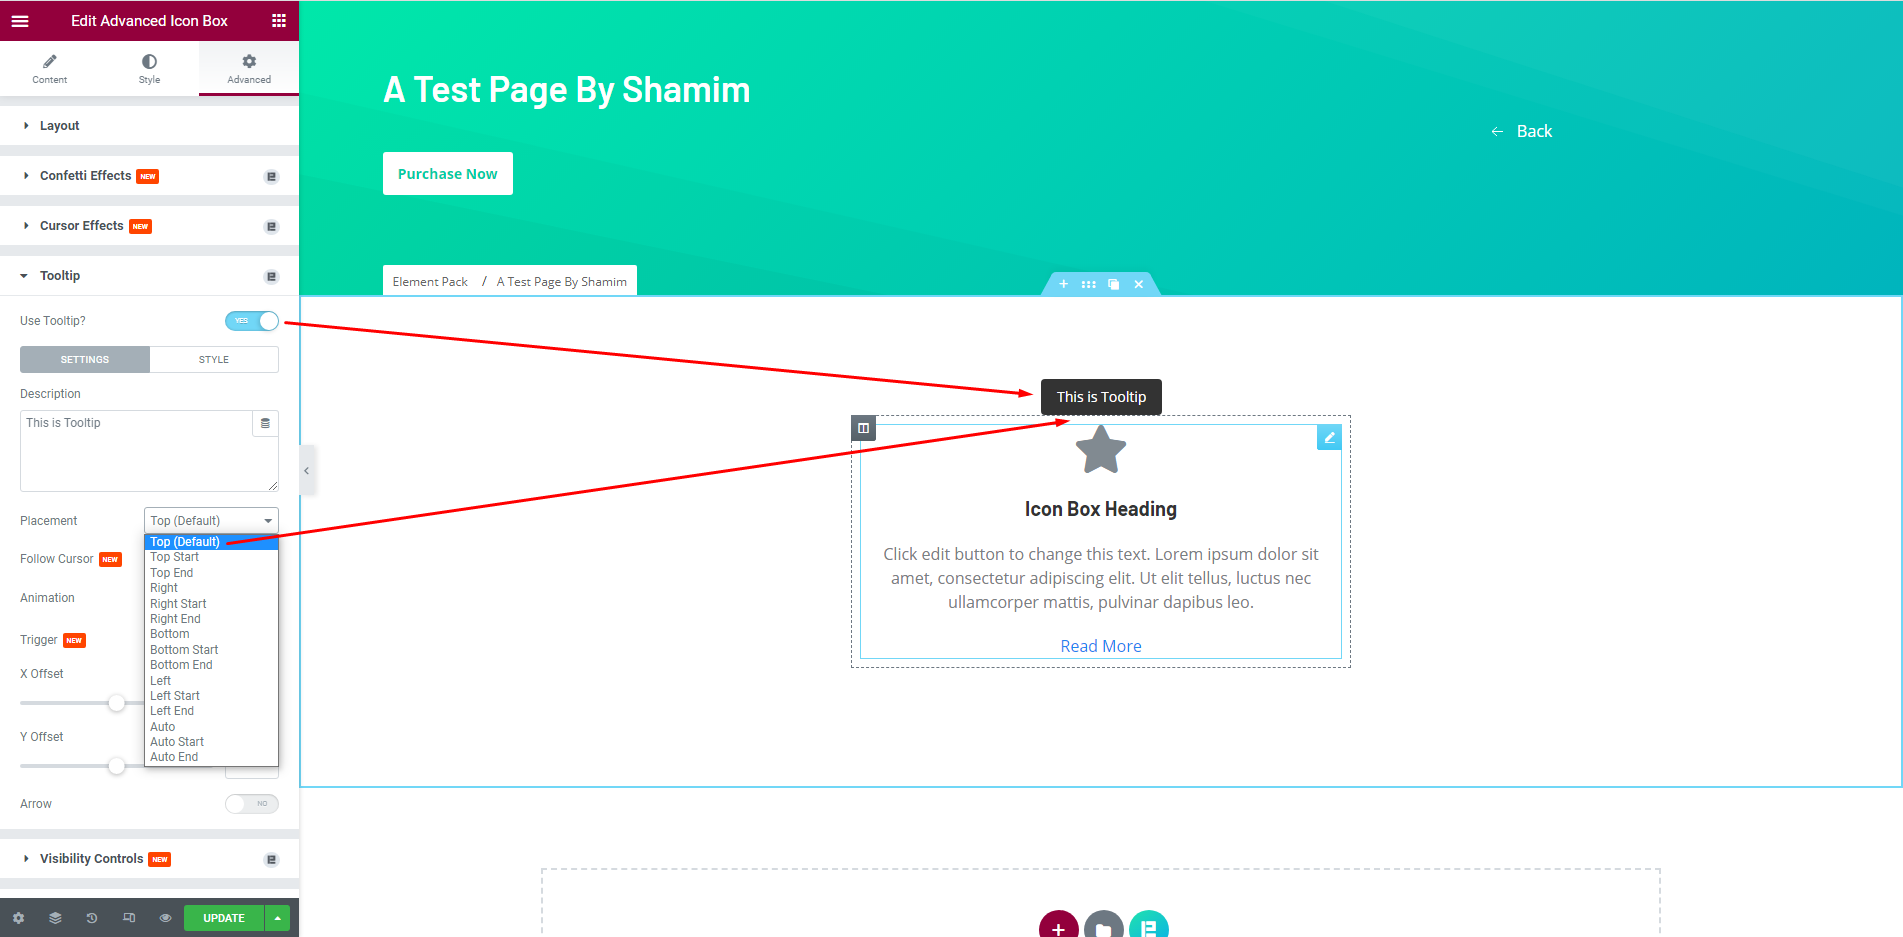
Finally, after enabling the switcher, select the position of the tooltip from the ‘Placement’ menu and see the effect. The default position is Top, you can select other positions as you like from the menu.
Good job! You have successfully set up to show the tooltip using Elementor.
Conclusion
We hope you enjoyed our article about how to show advanced tooltips using Elementor. This can be very useful for the purpose of showing additional information to your website visitors in an unobtrusive manner.
Thank you for reading this article. Have a nice day.